
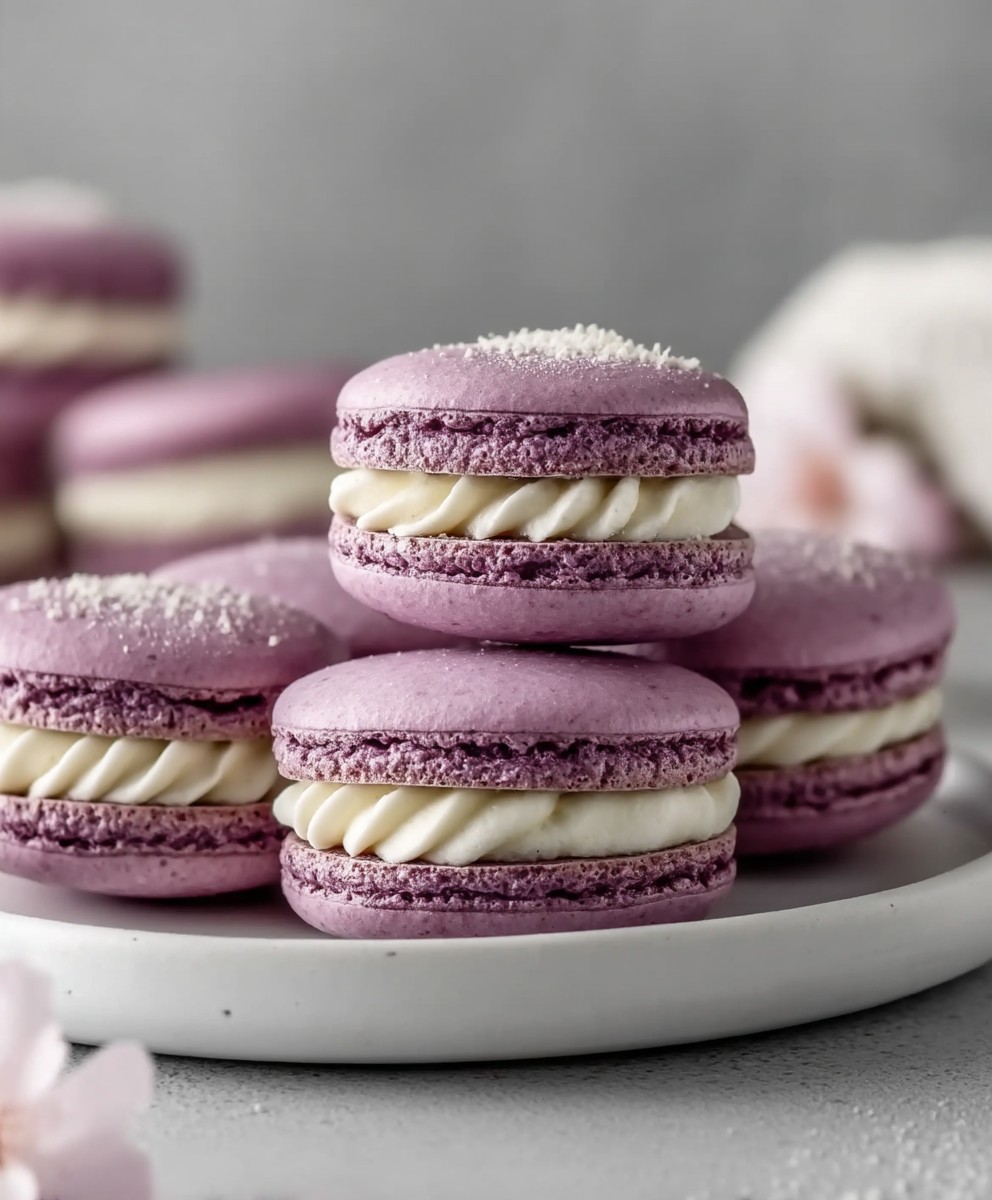
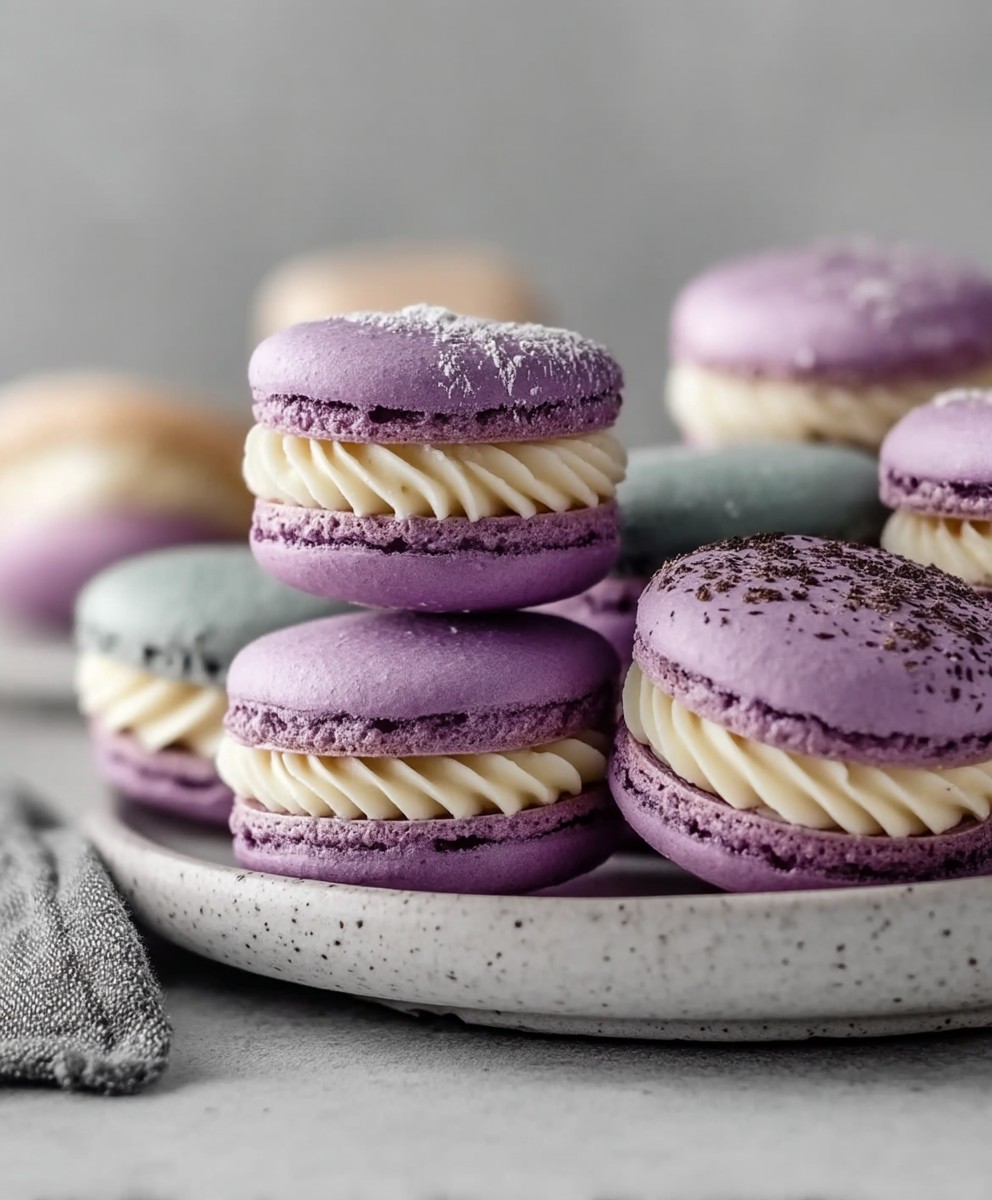
French Macarons for Beginners
French macarons for beginners are not just a delightful treat; they are a culinary adventure that brings a touch of elegance to any occasion. These delicate, colorful confections have a rich history that dates back to the 16th century, originating in Italy before making their way to France, where they evolved into the beloved dessert we know today. The combination of a crisp outer shell and a soft, chewy interior filled with luscious ganache or buttercream is what makes these macarons irresistible.
People love French macarons for their exquisite taste and texture, as well as their versatility in flavors and colors. Whether you prefer classic vanilla, vibrant raspberry, or even exotic matcha, there’s a macaron for everyone. Plus, they are surprisingly convenient to make at home, allowing you to impress friends and family with your baking skills. In this article, I will guide you through the process of creating these delightful French macarons for beginners, ensuring that you can enjoy the satisfaction of crafting these beautiful treats in your own kitchen.
Ingredients:
- 1 cup (100g) almond flour
- 1 ¾ cups (200g) powdered sugar
- 3 large egg whites (room temperature)
- ¼ cup (50g) granulated sugar
- 1 teaspoon vanilla extract
- Pinch of salt
- Food coloring (optional)
- Buttercream or ganache for filling (your choice of flavor)
Preparing the Batter
Step 1: Sift the Dry Ingredients
First, I start by sifting the almond flour and powdered sugar together into a large bowl. This step is crucial as it helps to eliminate any lumps and ensures a smooth macaron shell. I usually do this twice to make sure everything is well combined and airy.
Step 2: Whip the Egg Whites
Next, I take my egg whites and place them in a clean, dry mixing bowl. Using a stand mixer or a hand mixer, I begin to whip the egg whites on medium speed until they become frothy. This usually takes about 1-2 minutes.
Step 3: Add Granulated Sugar
Once the egg whites are frothy, I gradually add the granulated sugar while continuing to whip. I increase the speed to high and whip until stiff peaks form. This can take about 5-7 minutes. I know it’s ready when I can turn the bowl upside down without the egg whites moving!
Step 4: Add Flavor and Color
After achieving stiff peaks, I gently fold in the vanilla extract and a pinch of salt. If I want to add color, this is the time to add a few drops of food coloring. I use a spatula to fold the color in gently, ensuring not to deflate the egg whites.
Step 5: Combine Dry Ingredients with Meringue
Now, I take the sifted almond flour and powdered sugar mixture and add it to the whipped egg whites. Using a spatula, I fold the mixture together. I do this gently but thoroughly, making sure to incorporate all the dry ingredients without overmixing. The batter should flow like lava and form a ribbon when lifted with a spatula.
Piping the Macarons
Step 6: Prepare the Baking Sheets
While I’m mixing the batter, I preheat my oven to 300°F (150°C). I line two baking sheets with parchment paper or silicone baking mats. To ensure uniformity, I often use a template underneath the parchment paper to guide my piping.
Step 7: Pipe the Macarons
Once the batter is ready, I transfer it to a piping bag fitted with a round tip (about 1/2 inch in diameter). I hold the piping bag vertically above the prepared baking sheet and pipe small circles, about 1.5 inches in diameter, leaving space between each macaron. I usually make sure to tap the baking sheet on the counter a few times to release any air bubbles.
Step 8: Rest the Macarons
After piping, I let the macarons rest at room temperature for about 30-60 minutes. This step is essential as it allows a skin to form on the surface, which helps them rise properly during baking.
Cooking Process
Step 9: Bake the Macarons
Once the macarons have formed a skin, I place them in the preheated oven. I bake them for about 15-20 minutes, rotating the baking sheets halfway through to ensure even baking. I know they are done when they have risen and formed a “foot” at the bottom, and they should not be sticky to the touch.
Step 10: Cool the Macarons
After baking, I remove the macarons from the oven and let them cool on the baking sheets for about 5 minutes. Then, I carefully transfer them to a wire rack to cool completely. This is important as it prevents them from becoming soggy.
Assembling the Macarons
Step 11: Prepare the Filling
While the macarons are cooling, I prepare my filling. I usually opt for a simple buttercream or chocolate ganache. For buttercream, I beat together 1 cup of softened butter with 4 cups of
Conclusion:
If you’ve been searching for a delightful treat that not only satisfies your sweet tooth but also impresses your friends and family, then this recipe for French macarons is a must-try! These delicate, colorful confections are not only visually stunning but also offer a unique combination of textures and flavors that make them irresistible. The crisp outer shell gives way to a soft, chewy interior, and when filled with your choice of ganache, buttercream, or jam, they become a truly gourmet experience.
One of the best things about making French macarons is the endless possibilities for customization. You can experiment with different flavors by adding extracts, zest, or even spices to the batter. For a fun twist, try incorporating food coloring to create vibrant, eye-catching macarons that are perfect for any occasion. You can also play around with the fillings; consider using flavored creams, fruit preserves, or even chocolate ganache to suit your taste. The versatility of this recipe allows you to tailor each batch to your liking, making it a fantastic option for parties, holidays, or just a cozy afternoon treat.
When serving your macarons, consider pairing them with a cup of tea or coffee for a delightful afternoon snack. They also make for an elegant dessert at dinner parties or special celebrations. You can even create a beautiful macaron tower as a centerpiece for weddings or birthdays, showcasing your baking skills and creativity.
I encourage you to give this French macarons recipe a try! While they may seem intimidating at first, with a little practice and patience, you’ll be able to master the art of macaron-making. Don’t forget to share your experience with friends and family, and let them know how much fun you had creating these delicious treats. Whether you’re a beginner or an experienced baker, I’m confident that you’ll find joy in making and sharing these delightful French macarons.
So roll up your sleeves, gather your ingredients, and embark on this sweet adventure. I can’t wait to hear about your macarons journey! Remember, the key to success is practice, so don’t be discouraged if your first batch isn’t perfect. Each attempt will bring you closer to achieving those beautiful, airy shells that are the hallmark of a perfect macaron. Happy baking!
French Macarons for Beginners: A Step-by-Step Guide to Perfecting Your Recipe
Delightful and delicate, these homemade macarons are made with almond flour and filled with your choice of buttercream or ganache. Perfect for any occasion, they are sure to impress with their beautiful colors and flavors!
Ingredients
- powdered sugar
- milk
- 1 cup heavy cream
- 8 ounces chopped chocolate
- almond flour
- buttercream or ganache
Instructions
- Once the macarons are completely cool, take one shell and pipe a small amount of filling onto the flat side.
- Gently press another shell on top to create a sandwich.
- Repeat this process until all the macarons are filled.
- For the best flavor and texture, let the filled macarons sit in the refrigerator for at least 24 hours before serving.
Notes
- Make sure your mixing bowl and utensils are completely clean and dry to ensure the egg whites whip properly.
- Experiment with different flavors and colors for your macarons to create a variety of delicious treats!
- Macarons can be stored in an airtight container in the refrigerator for up to a week.

Leave a Comment