
Homemade Peanut Butter Cups: A Sweet Indulgence
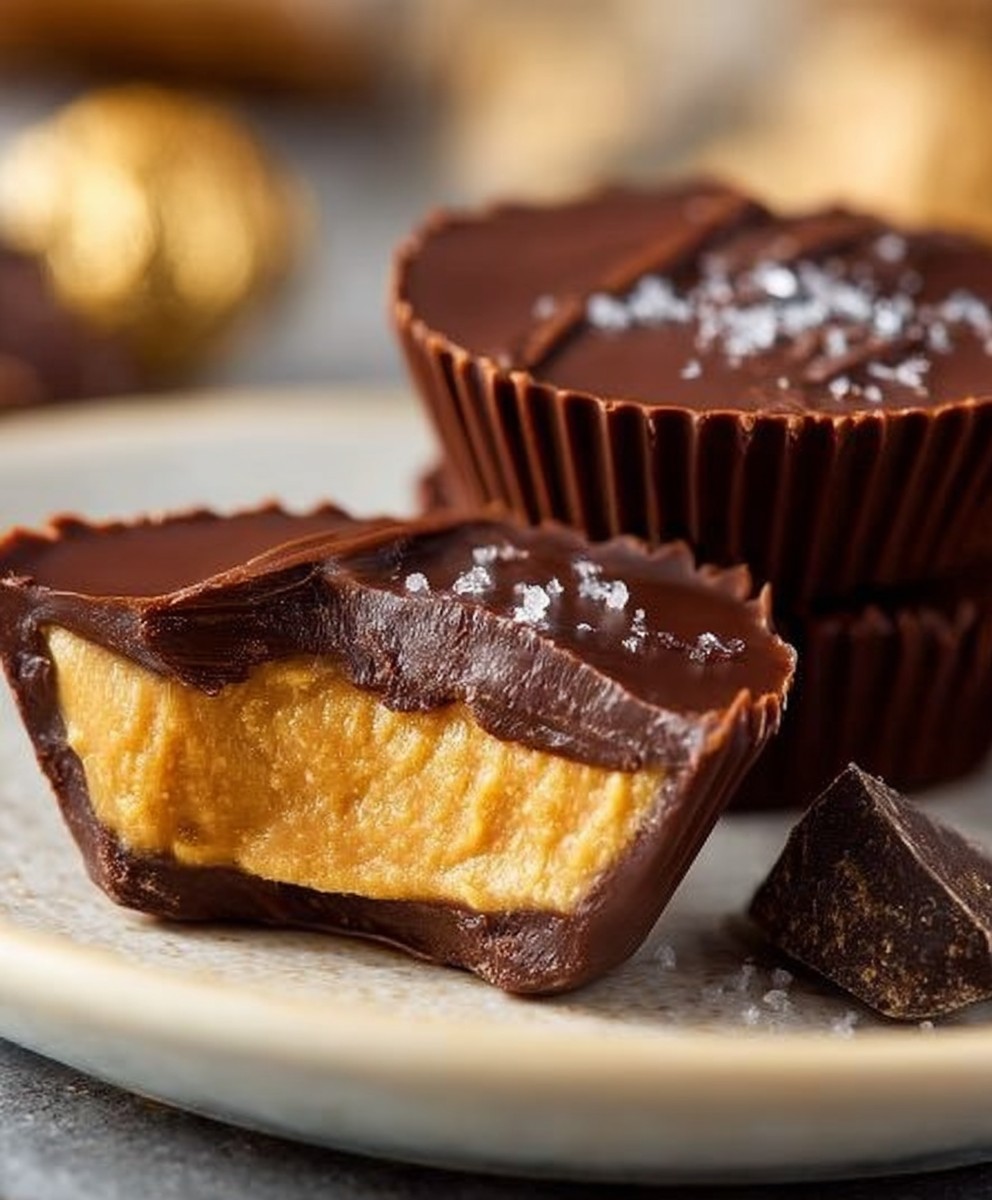
Homemade Peanut Butter Cups are a delightful treat that brings together the rich, creamy texture of peanut butter and the smooth, decadent taste of chocolate. As a child, I remember eagerly unwrapping those store-bought versions, but nothing compares to the satisfaction of making them from scratch. This recipe not only allows you to customize the sweetness and ingredients but also connects you to a long-standing tradition of candy-making that has delighted taste buds for generations.
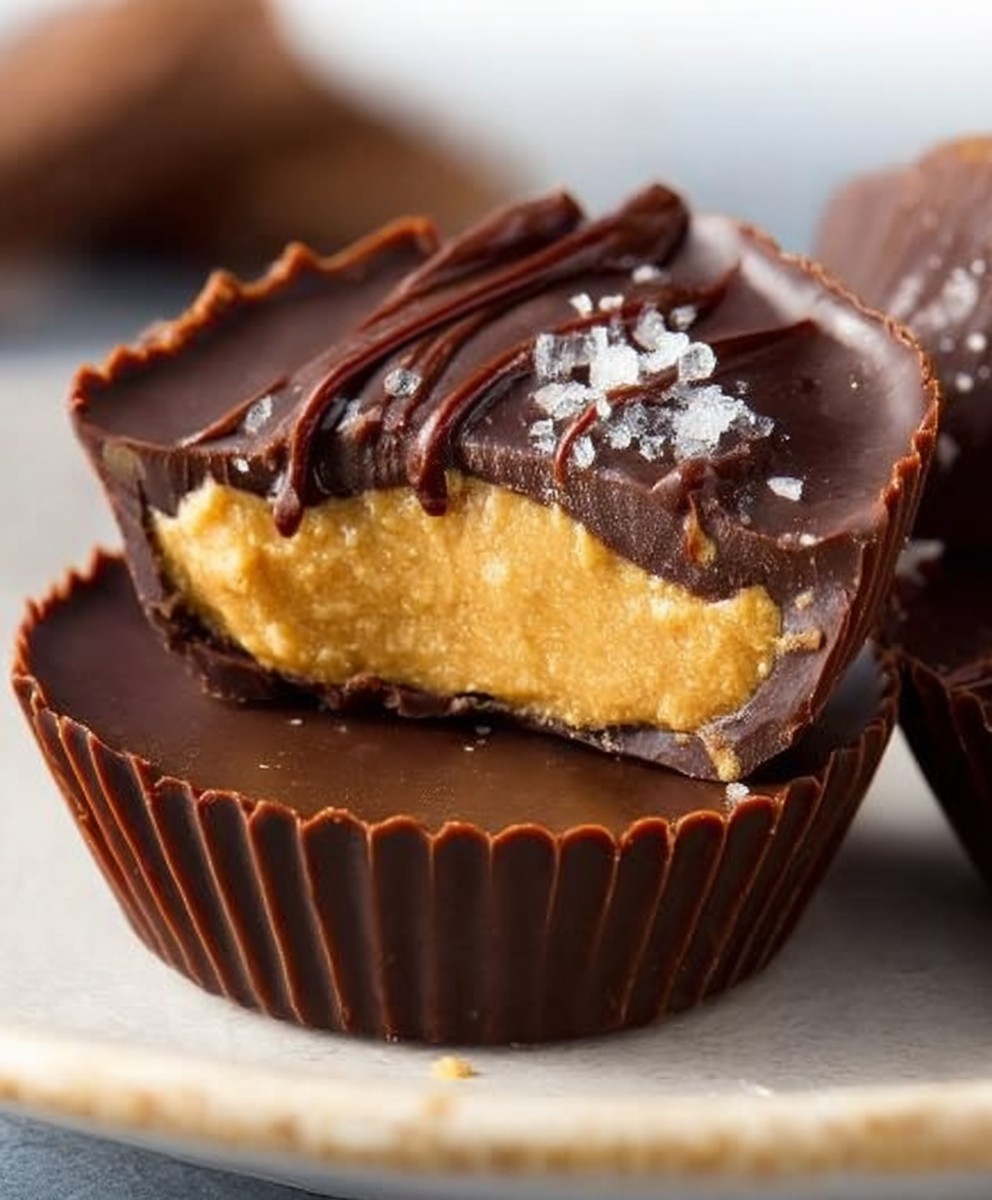
People love Homemade Peanut Butter Cups for their perfect balance of flavors and textures. The combination of crunchy peanut butter enveloped in a silky chocolate shell creates a mouthwatering experience that is hard to resist. Plus, they are incredibly convenient to make, requiring just a few simple ingredients that you likely already have in your pantry. Whether you’re preparing a special treat for a gathering or simply indulging yourself, these Homemade Peanut Butter Cups are sure to become a favorite in your household.
Ingredients:
- 1 cup creamy peanut butter
- 1 cup powdered sugar
- 1 teaspoon vanilla extract
- 1 ½ cups milk chocolate chips
- ½ cup semi-sweet chocolate chips
- 1 tablespoon coconut oil (optional, for smoother chocolate)
- 1 pinch of salt
Preparing the Peanut Butter Filling
- In a medium mixing bowl, combine the creamy peanut butter, powdered sugar, vanilla extract, and a pinch of salt. Use a spatula or a wooden spoon to mix the ingredients together until they are well combined and smooth.
- Once the mixture is smooth, taste it to ensure the sweetness is to your liking. If you prefer it sweeter, you can add a little more powdered sugar, but be careful not to make it too sweet.
- After achieving the desired taste, set the peanut butter filling aside while you prepare the chocolate coating.
Melting the Chocolate
- In a microwave-safe bowl, combine the milk chocolate chips and semi-sweet chocolate chips. If you want a smoother texture, add the coconut oil to the chocolate chips.
- Microwave the chocolate mixture in 30-second intervals, stirring in between each interval. This will help prevent the chocolate from burning. Continue until the chocolate is completely melted and smooth.
- Once melted, remove the bowl from the microwave and let it cool for a few minutes. You want it to be warm but not hot, as hot chocolate can melt the peanut butter filling.
Assembling the Peanut Butter Cups
- Prepare a muffin tin by lining it with paper liners. This will make it easier to remove the peanut butter cups once they are set.
- Using a spoon, pour a small amount of the melted chocolate into the bottom of each muffin liner. You want just enough to cover the bottom, about 1 tablespoon per cup.
- Gently tap the muffin tin on the counter to help the chocolate settle evenly at the bottom.
- Place the muffin tin in the refrigerator for about 10-15 minutes, or until the chocolate has hardened.
- Once the chocolate has set, remove the muffin tin from the refrigerator. Take the peanut butter filling and scoop about 1 tablespoon of the mixture into each chocolate-lined cup. Use the back of the spoon to flatten the filling slightly, ensuring it stays within the edges of the chocolate.
- After adding the peanut butter filling, pour another layer of melted chocolate over the top of each cup, covering the peanut butter completely. Use a spoon to spread the chocolate evenly if needed.
- Tap the muffin tin again on the counter to help the top layer of chocolate settle and smooth out.
- Return the muffin tin to the refrigerator for another 30 minutes, or until the chocolate is fully set.
Storing and Serving
- Once the peanut butter cups are set, carefully remove them from the muffin tin by pulling on the edges of the paper liners.
- Store the peanut butter cups in an airtight container in the refrigerator. They can last for up to two weeks, but I doubt they will last that long!
- When ready to serve, you can enjoy them straight from the fridge or let them sit at room temperature for a few minutes for a softer texture.
- Feel free to get creative! You can sprinkle some sea salt on top of the chocolate before it sets for an extra flavor boost, or even add a layer of crushed nuts or pretzels for added crunch.
Tips for Success
- Make sure to use high-quality chocolate for the best flavor. You can also experiment with dark chocolate if you prefer a richer taste.
- If you want to make these peanut butter cups vegan, you can use dairy-free chocolate chips and natural peanut butter without added sugar.
- For a fun twist, try adding a layer of caramel or a sprinkle of crushed cookies in between the chocolate and peanut butter layers.
- Be patient while melting the chocolate. Stirring frequently will help achieve a smooth consistency without burning.
Final
Conclusion:
If you’re looking for a delightful treat that combines the rich, creamy goodness of chocolate with the nutty flavor of peanut butter, then these Homemade Peanut Butter Cups are an absolute must-try! Not only are they incredibly easy to make, but they also allow you to customize the ingredients to suit your taste. Whether you prefer dark chocolate, milk chocolate, or even a dairy-free option, this recipe is versatile enough to accommodate your preferences.
One of the best things about making your own peanut butter cups is that you can control the sweetness and the quality of the ingredients. You can use organic peanut butter, add a pinch of sea salt for that perfect sweet-and-salty balance, or even incorporate some crushed nuts or crispy rice for added texture. The possibilities are endless!
When it comes to serving suggestions, these homemade treats are perfect for any occasion. You can serve them at birthday parties, holiday gatherings, or simply enjoy them as a sweet snack during movie night. They also make fantastic gifts! Just package them in a cute box or jar, and you have a thoughtful, homemade present that anyone would love.
If you’re feeling adventurous, consider trying some variations. For instance, you could add a layer of caramel or a sprinkle of sea salt on top before the chocolate sets. You could also experiment with different nut butters, like almond or cashew, for a unique twist. The beauty of this recipe is that it’s not just about following the steps; it’s about making it your own and having fun in the kitchen!
I encourage you to give this recipe a try and experience the joy of creating your own Homemade Peanut Butter Cups. Once you take that first bite, I promise you’ll be hooked! And don’t forget to share your experience with friends and family. Whether you post a picture on social media or simply tell someone about your delicious creation, spreading the word about this delightful treat is part of the fun.
So, roll up your sleeves, gather your ingredients, and get ready to indulge in a sweet adventure. I can’t wait to hear how your homemade peanut butter cups turn out! Happy cooking!
Homemade Peanut Butter Cups: Easy Recipe for Delicious Treats
Enjoy these delightful homemade peanut butter cups featuring a creamy peanut butter center enveloped in rich chocolate. They're simple to make and perfect for satisfying your sweet cravings!
Ingredients
- 1 cup creamy peanut butter
- 1 cup powdered sugar
- 1 teaspoon vanilla extract
- 1 ½ cups milk chocolate chips
- ½ cup semi-sweet chocolate chips
- 1 tablespoon coconut oil (optional, for smoother chocolate)
- 1 pinch of salt
Instructions
- In a medium mixing bowl, combine the creamy peanut butter, powdered sugar, vanilla extract, and a pinch of salt. Mix until smooth.
- Taste the mixture and adjust sweetness with more powdered sugar if desired.
- Set the peanut butter filling aside.
- In a microwave-safe bowl, combine the milk chocolate chips and semi-sweet chocolate chips. Add coconut oil if desired.
- Microwave in 30-second intervals, stirring in between, until melted and smooth.
- Let the melted chocolate cool slightly.
- Line a muffin tin with paper liners.
- Pour about 1 tablespoon of melted chocolate into the bottom of each liner.
- Tap the muffin tin to settle the chocolate, then refrigerate for 10-15 minutes until hardened.
- Scoop 1 tablespoon of peanut butter filling into each chocolate-lined cup, flattening slightly.
- Pour another layer of melted chocolate over the filling, covering it completely.
- Tap the muffin tin again to smooth the top layer, then refrigerate for another 30 minutes until fully set.
- Carefully remove the peanut butter cups from the muffin tin by pulling on the paper liners.
- Store in an airtight container in the refrigerator for up to two weeks.
- Serve chilled or let sit at room temperature for a softer texture. Optionally, sprinkle sea salt or add crushed nuts for extra flavor.
Notes
- Use high-quality chocolate for the best flavor.
- For a vegan version, opt for dairy-free chocolate chips and natural peanut butter.
- Experiment with layers of caramel or crushed cookies for added texture.
Leave a Comment