
No-Bake Oreo Cheesecake
No-Bake Oreo Cheesecake is a delightful dessert that combines the rich, creamy texture of cheesecake with the beloved crunch of Oreo cookies. This indulgent treat is not only a crowd-pleaser but also a breeze to prepare, making it perfect for any occasion. The origins of cheesecake date back to ancient Greece, but the modern twist of incorporating Oreos has made it a favorite in households around the world.
People love this dish for its luscious flavor and the way it effortlessly melts in your mouth. The combination of the sweet, creamy filling and the crunchy cookie crust creates a delightful contrast that keeps everyone coming back for more. Plus, the convenience of a no-bake recipe means you can whip it up in no time, leaving you with more moments to enjoy with family and friends. Trust me, once you try this No-Bake Oreo Cheesecake, it will quickly become a staple in your dessert repertoire!
Ingredients:
- 24 Oreo cookies, crushed
- 1/4 cup unsalted butter, melted
- 16 oz cream cheese, softened
- 1 cup powdered sugar
- 1 teaspoon vanilla extract
- 1 cup heavy whipping cream
- 1/2 cup mini chocolate chips (optional)
- Additional Oreo cookies for topping
Preparing the Crust
- Start by gathering all your ingredients and tools. You will need a mixing bowl, a 9-inch springform pan, and a spatula.
- In a mixing bowl, combine the crushed Oreo cookies and melted butter. Stir until the mixture resembles wet sand.
- Press the Oreo mixture firmly into the bottom of the springform pan. Make sure it’s evenly distributed and compacted to form a solid crust.
- Place the crust in the refrigerator to chill while you prepare the cheesecake filling. This will help it set and hold its shape better.
Making the Cheesecake Filling
- In a large mixing bowl, beat the softened cream cheese with an electric mixer on medium speed until smooth and creamy. This should take about 2-3 minutes.
- Add the powdered sugar and vanilla extract to the cream cheese. Continue to mix until fully combined and there are no lumps.
- In a separate bowl, whip the heavy cream until stiff peaks form. This usually takes about 3-5 minutes with an electric mixer on high speed.
- Gently fold the whipped cream into the cream cheese mixture using a spatula. Be careful not to deflate the whipped cream; you want to keep the mixture light and airy.
- If you’re using mini chocolate chips, fold them into the cheesecake mixture at this point.
Assembling the Cheesecake
- Retrieve the crust from the refrigerator. Pour the cheesecake filling over the chilled crust, spreading it evenly with a spatula.
- Tap the pan gently on the counter to remove any air bubbles and ensure the filling is evenly distributed.
- Cover the cheesecake with plastic wrap or aluminum foil and place it in the refrigerator. Allow it to chill for at least 4 hours, but overnight is best for optimal firmness.
Serving the Cheesecake
- Once the cheesecake has set, carefully remove the sides of the springform pan. You can run a knife around the edge to help release it if needed.
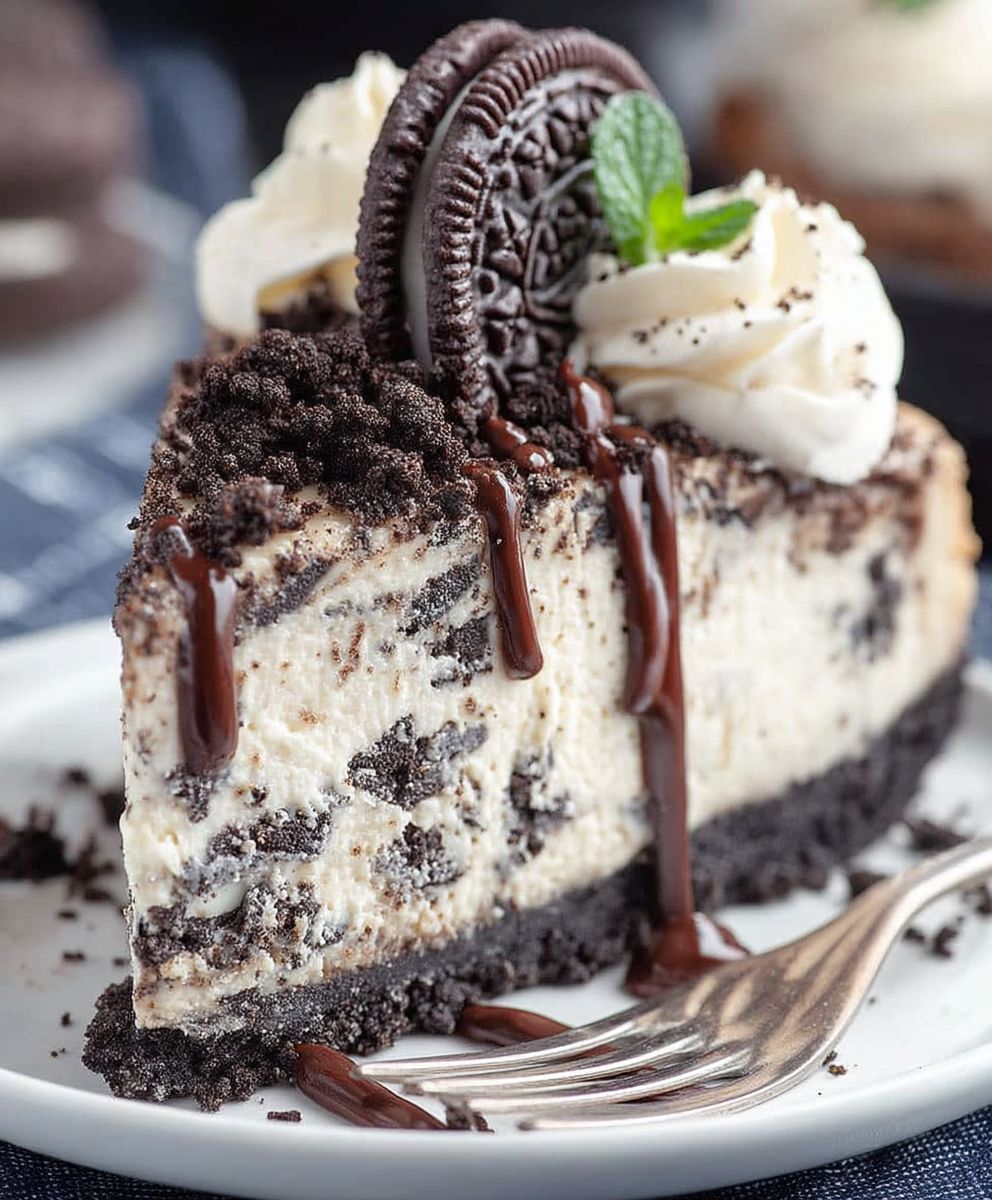
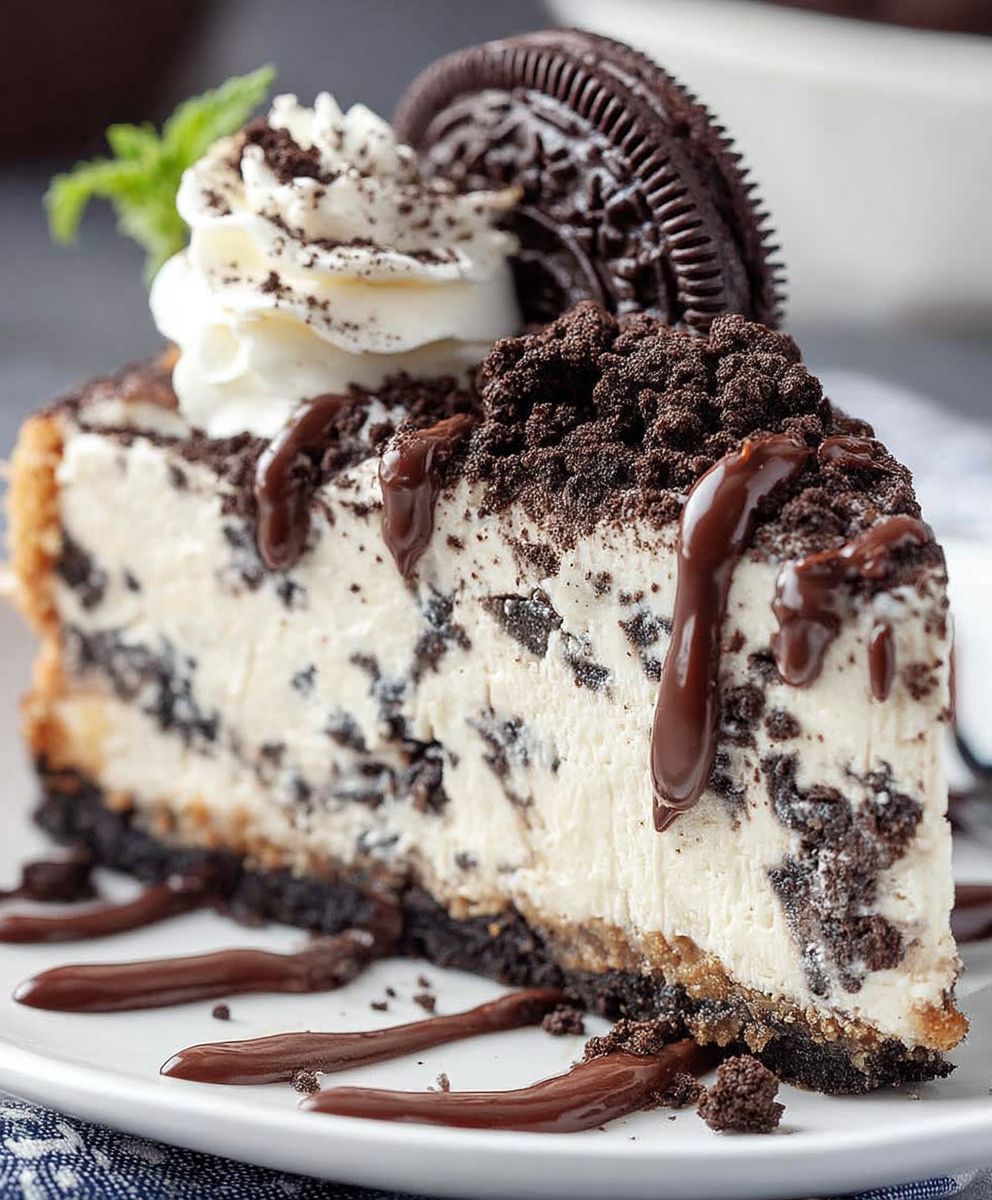
- For a decorative touch, crush a few additional Oreo cookies and sprinkle them on top of the cheesecake.
- Slice the cheesecake into wedges using a sharp knife. For cleaner cuts, dip the knife in hot water and wipe it dry before slicing.
- Serve the cheesecake chilled. You can add whipped cream or chocolate sauce on the side for extra indulgence.
Storage Tips
- If you have leftovers, cover the cheesecake with plastic wrap and store it in the refrigerator. It will keep well for up to 5 days.
- You can also freeze the cheesecake. Wrap it tightly in plastic wrap and then in aluminum foil. It can be frozen for up to 2 months. To serve, thaw it in the refrigerator overnight before enjoying.
Variations and Additions
- For a minty twist, add 1/2 teaspoon of peppermint extract to the cheesecake filling.
- Incorporate different flavors by using flavored cream cheese, such as chocolate or strawberry.
- Top with fresh berries or a fruit compote for a refreshing contrast to the rich cheesecake.
Final Thoughts
This No-Bake Oreo Cheesecake is a delightful dessert that’s perfect for any occasion. It’s easy to make, requires no baking, and is sure to impress your family and friends. Enjoy every creamy, chocolatey bite!
Conclusion:
If you’re looking for a dessert that’s not only delicious but also incredibly easy to make, then this No-Bake Oreo Cheesecake is a must-try! The combination of creamy cheesecake filling and crunchy Oreo crust creates a delightful contrast that will have your taste buds dancing with joy. Plus, the fact that it requires no baking means you can whip it up in no time, making it perfect for any occasion, whether it’s a family gathering, a birthday party, or just a sweet treat for yourself.
One of the best things about this No-Bake Oreo Cheesecake is its versatility. You can serve it as is, or you can get creative with toppings and variations. Consider drizzling some chocolate sauce over the top for an extra indulgent touch, or add a dollop of whipped cream and a sprinkle of crushed Oreos for a beautiful presentation. If you want to mix things up, try incorporating different flavors by adding a layer of fruit preserves or even a hint of mint extract to the cheesecake filling. The possibilities are endless, and each variation can bring a new twist to this classic dessert.
I encourage you to give this No-Bake Oreo Cheesecake a try! It’s a crowd-pleaser that’s sure to impress your friends and family. Once you’ve made it, don’t forget to share your experience! I would love to hear how it turned out for you and any creative twists you added. You can share your photos and thoughts on social media or in the comments section below. Your feedback not only helps me improve but also inspires others to dive into the world of no-bake desserts.
In conclusion, this No-Bake Oreo Cheesecake is not just a recipe; it’s an experience that brings joy and satisfaction with every bite. So gather your ingredients, roll up your sleeves, and get ready to create a dessert that will leave everyone asking for seconds. Trust me, once you try this recipe, it will become a staple in your dessert repertoire. Happy baking (or should I say, happy no-baking)!
No-Bake Oreo Cheesecake: The Ultimate Easy Dessert Recipe
A delicious and easy-to-make dish that combines fresh ingredients and bold flavors, perfect for any occasion. Enjoy a satisfying meal that is both nutritious and delightful!
Ingredients
- 500 g Mehl (Type 550)
- 10 g Salz
- 5 g Trockenhefe
- 350 ml Wasser
- 3 Zehen Knoblauch, gehackt
- 2 EL Olivenöl
Instructions
- In einer großen Schüssel Mehl, Salz und Hefe vermengen.
- Wasser hinzufügen und zu einem Teig verrühren.
- Knoblauch und Olivenöl unterrühren.
- Teig 12 Stunden gehen lassen.
Notes
- Der Teig darf während der Ruhezeit nicht bewegt werden.
- Für ein intensiveres Knoblaucharoma können mehr Zehen verwendet werden.

Leave a Comment