
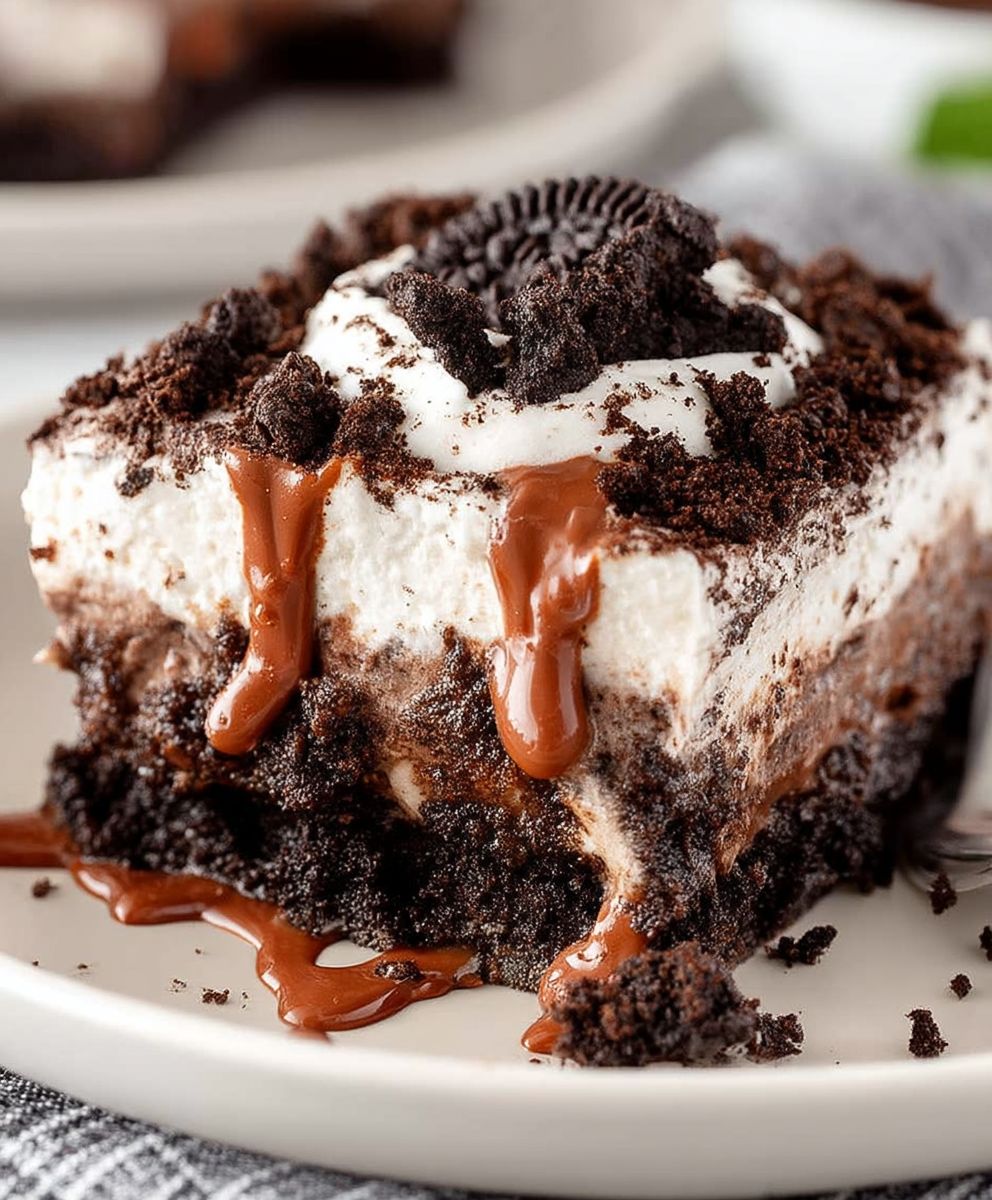
No Bake Oreo Dessert
No Bake Oreo Dessert is a delightful treat that brings together the rich, creamy flavors of chocolate and vanilla in a way that is both indulgent and incredibly easy to prepare. This dessert has become a favorite in many households, especially during the warmer months when turning on the oven feels like a chore. With its origins rooted in classic American dessert culture, the No Bake Oreo Dessert has evolved into a beloved staple for gatherings, potlucks, and family celebrations.
People love this dish not only for its irresistible taste and texture but also for its convenience. The combination of crushed Oreo cookies, creamy layers of whipped topping, and a hint of cream cheese creates a luscious dessert that melts in your mouth. Plus, it requires no baking, making it perfect for those who want to whip up something special without the hassle. Whether you’re a seasoned baker or a novice in the kitchen, this No Bake Oreo Dessert is sure to impress your friends and family with its simplicity and deliciousness.
Ingredients:
- 24 Oreo cookies, crushed
- 1/2 cup unsalted butter, melted
- 8 oz cream cheese, softened
- 1/2 cup granulated sugar
- 1 tsp vanilla extract
- 2 cups whipped topping (like Cool Whip)
- 1 cup chocolate pudding mix
- 2 cups milk
- Additional crushed Oreos for topping
Preparing the Crust
- Start by crushing the Oreo cookies. You can do this by placing them in a zip-top bag and using a rolling pin to crush them into fine crumbs. Alternatively, you can use a food processor for a quicker method.
- In a medium mixing bowl, combine the crushed Oreo cookies with the melted butter. Mix well until all the crumbs are evenly coated with butter.
- Press the mixture firmly into the bottom of a 9×13 inch baking dish to form an even crust. Make sure to pack it tightly so it holds together once set.
- Place the crust in the refrigerator to chill while you prepare the filling. This will help it firm up.
Making the Cream Cheese Layer
- In a large mixing bowl, beat the softened cream cheese with an electric mixer until smooth and creamy. This should take about 2-3 minutes.
- Add the granulated sugar and vanilla extract to the cream cheese. Continue to beat until the mixture is well combined and fluffy.
- Gently fold in the whipped topping using a spatula. Be careful not to deflate the whipped topping; you want to keep the mixture light and airy.
- Once combined, spread the cream cheese mixture evenly over the chilled Oreo crust. Use a spatula to smooth the top.
Preparing the Chocolate Pudding Layer
- In a separate bowl, whisk together the chocolate pudding mix and milk. Make sure to follow the instructions on the pudding mix package for the correct milk-to-pudding ratio.
- Continue whisking for about 2 minutes until the mixture thickens. It should have a smooth and creamy consistency.
- Once thickened, pour the chocolate pudding over the cream cheese layer. Use a spatula to spread it evenly across the top.
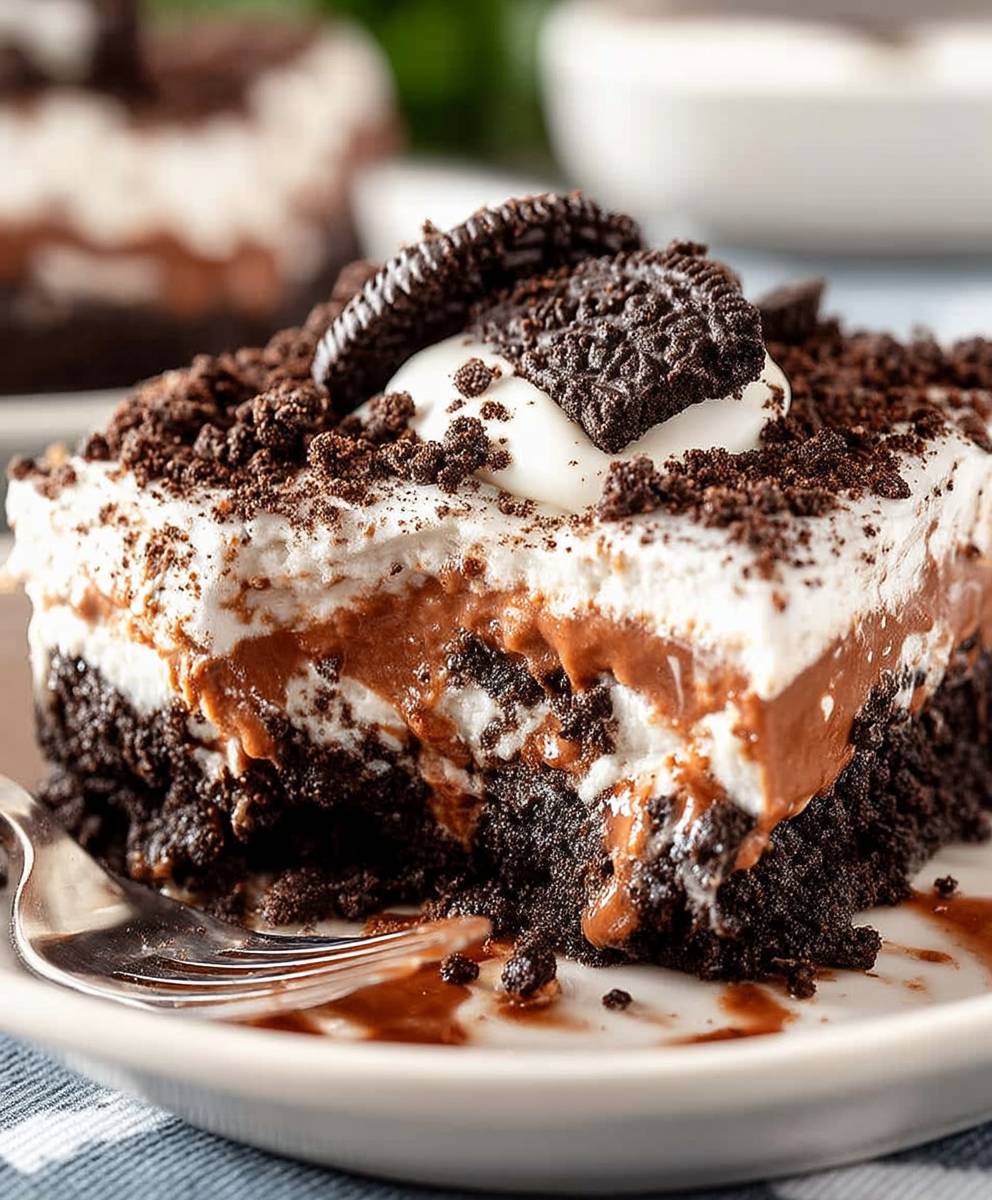
Assembling the Dessert
- After adding the chocolate pudding layer, cover the dessert with plastic wrap or aluminum foil. Make sure it’s sealed well to prevent any air from getting in.
- Refrigerate the dessert for at least 4 hours, or overnight if possible. This allows the layers to set properly and the flavors to meld together.
Finishing Touches
- Once the dessert has set, remove it from the refrigerator. Carefully peel off the plastic wrap or foil.
- Before serving, sprinkle additional crushed Oreos on top for a decorative touch and added crunch.
- Cut into squares and serve chilled. Enjoy the delightful layers of creamy goodness!
Storage Tips
- If you have any leftovers, store them in an airtight container in the refrigerator. The dessert will keep well for up to 3 days.
- For best results, try to consume it within the first couple of days to enjoy the freshness of the whipped topping and the texture of the crust.
Variations
- Mint Oreo Version: Use Mint Oreos instead of regular Oreos for a refreshing twist.
- Peanut Butter Layer: Add a layer of peanut butter mixed with whipped topping for a nutty flavor.
- Fruit Addition: Layer in some sliced bananas or strawberries between the cream cheese and pudding layers for a fruity touch.
Serving Suggestions
- This dessert pairs wonderfully with a scoop of vanilla ice cream or a dollop of whipped cream on top.
- For a more decadent experience, drizzle some chocolate syrup over the top before serving.
- 24 Oreo cookies, crushed
- 1/2 cup unsalted butter, melted
- 8 oz cream cheese, softened
- 1/2 cup granulated sugar
- 1 tsp vanilla extract
- 2 cups whipped topping (like Cool Whip)
- 1 cup chocolate pudding mix
- 2 cups milk
- Additional crushed Oreos for topping
- Start by crushing the Oreo cookies. You can do this by placing them in a zip-top bag and using a rolling pin to crush them into fine crumbs. Alternatively, you can use a food processor for a quicker method.
- In a medium mixing bowl, combine the crushed Oreo cookies with the melted butter. Mix well until all the crumbs are evenly coated with butter.
- Press the mixture firmly into the bottom of a 9×13 inch baking dish to form an even crust. Make sure to pack it tightly so it holds together once set.
- Place the crust in the refrigerator to chill while you prepare the filling. This will help it firm up.
- In a large mixing bowl, beat the softened cream cheese with an electric mixer until smooth and creamy. This should take about 2-3 minutes.
- Add the granulated sugar and vanilla extract to the cream cheese. Continue to beat until the mixture is well combined and fluffy.
- Gently fold in the whipped topping using a spatula. Be careful not to deflate the whipped topping; you want to keep the mixture light and airy.
- Once combined, spread the cream cheese mixture evenly over the chilled Oreo crust. Use a spatula to smooth the top.
- In a separate bowl, whisk together the chocolate pudding mix and milk. Make sure to follow the instructions on the pudding mix package for the correct milk-to-pudding ratio.
- Continue whisking for about 2 minutes until the mixture thickens. It should have a smooth and creamy consistency.
- Once thickened, pour the chocolate pudding over the cream cheese layer. Use a spatula to spread it evenly across the top.
- After adding the chocolate pudding layer, cover the dessert with plastic wrap or aluminum foil. Make sure it’s sealed well to prevent any air from getting in.
- Refrigerate the dessert for at least 4 hours, or overnight if possible. This allows the layers to set properly and the flavors to meld together.
- Once the dessert has set, remove it from the refrigerator. Carefully peel off the plastic wrap or foil.
- Before serving, sprinkle additional crushed Oreos on top for a decorative touch and added crunch.
- Cut into squares and serve chilled. Enjoy the delightful layers of creamy goodness!
- If you have any leftovers, store them in an airtight container in the refrigerator. The dessert will keep well for up to 3 days.
- For best results, try to consume it within the first couple of days to enjoy the freshness of the whipped topping and the texture of the crust.
<
Conclusion:
If you’re looking for a dessert that’s not only delicious but also incredibly easy to make, then this No Bake Oreo Dessert is a must-try! With its creamy layers of whipped cream, cream cheese, and crushed Oreos, this dessert is a delightful treat that will satisfy any sweet tooth. The best part? You don’t even need to turn on the oven! This recipe is perfect for those hot summer days when you want something cool and refreshing without the hassle of baking.
When it comes to serving suggestions, this No Bake Oreo Dessert is versatile enough to suit any occasion. You can serve it in individual cups for a fun and personal touch, or present it in a large dish for a family gathering. For an extra special touch, consider garnishing each serving with a sprinkle of crushed Oreos or a dollop of whipped cream. You could even add a drizzle of chocolate sauce or a few fresh berries on top for a pop of color and flavor. If you’re feeling adventurous, try adding layers of other ingredients like peanut butter, caramel, or even a layer of your favorite ice cream to create your own unique twist on this classic dessert.
I encourage you to give this No Bake Oreo Dessert a try! It’s a simple yet impressive dish that’s sure to be a hit at any gathering, from birthday parties to potlucks. Plus, it’s a great way to get the kids involved in the kitchen—let them help crush the Oreos or layer the ingredients. I would love to hear about your experience making this dessert! Did you stick to the original recipe, or did you add your own special twist? Share your thoughts and any variations you tried in the comments below.
Remember, the joy of cooking comes not just from the final product, but also from the process and the memories you create along the way. So gather your ingredients, roll up your sleeves, and dive into making this No Bake Oreo Dessert. I promise you won’t regret it! Enjoy every creamy, chocolaty bite, and don’t forget to share your delicious results with friends and family. Happy baking (or should I say, happy no-baking)!
No Bake Oreo Dessert: A Simple and Delicious Recipe
Enjoy a delicious No-Bake Oreo Dessert with layers of creamy cream cheese, rich chocolate pudding, and a crunchy Oreo crust. This easy-to-make treat is perfect for any occasion and is sure to impress your guests!


Leave a Comment