
Remember those blistering summer days when the sidewalk was hot enough to fry an egg? My childhood solution to existential heat crises was always a big, ridiculously bright scoop of something icy, and nothing hit the spot quite likeRainbow Sherbet: A Colorful Delight for Your Taste Buds.
This recipe isn’t just dessert; it’s a vibrant, tangy time machine designed to cool you down, instantly improve your mood, and bring a splash of brilliant color to any occasion.
- A perfect blend of sweet citrus and creamy texture delivers a nostalgic, intensely refreshing punch that adults and children adore.
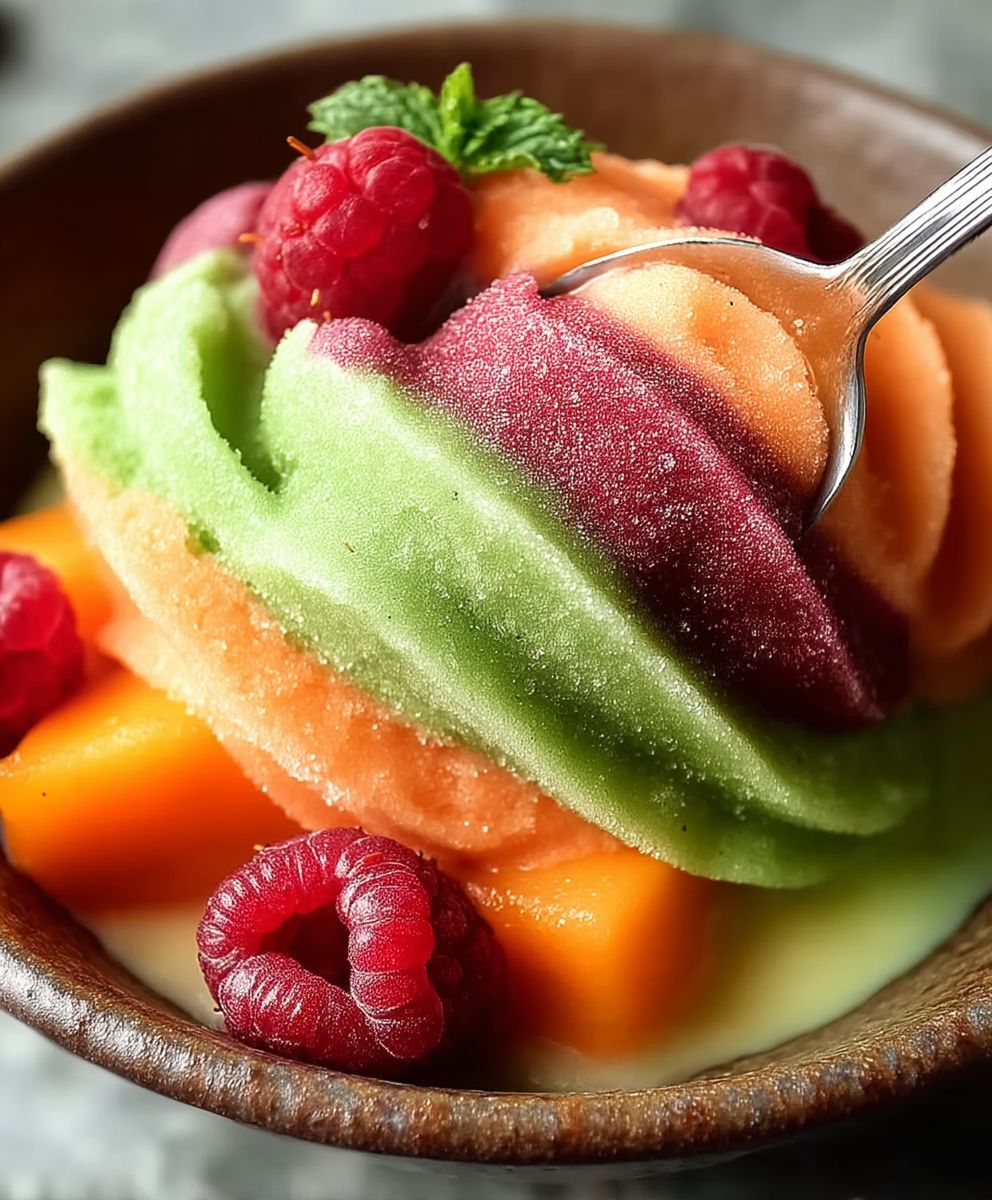
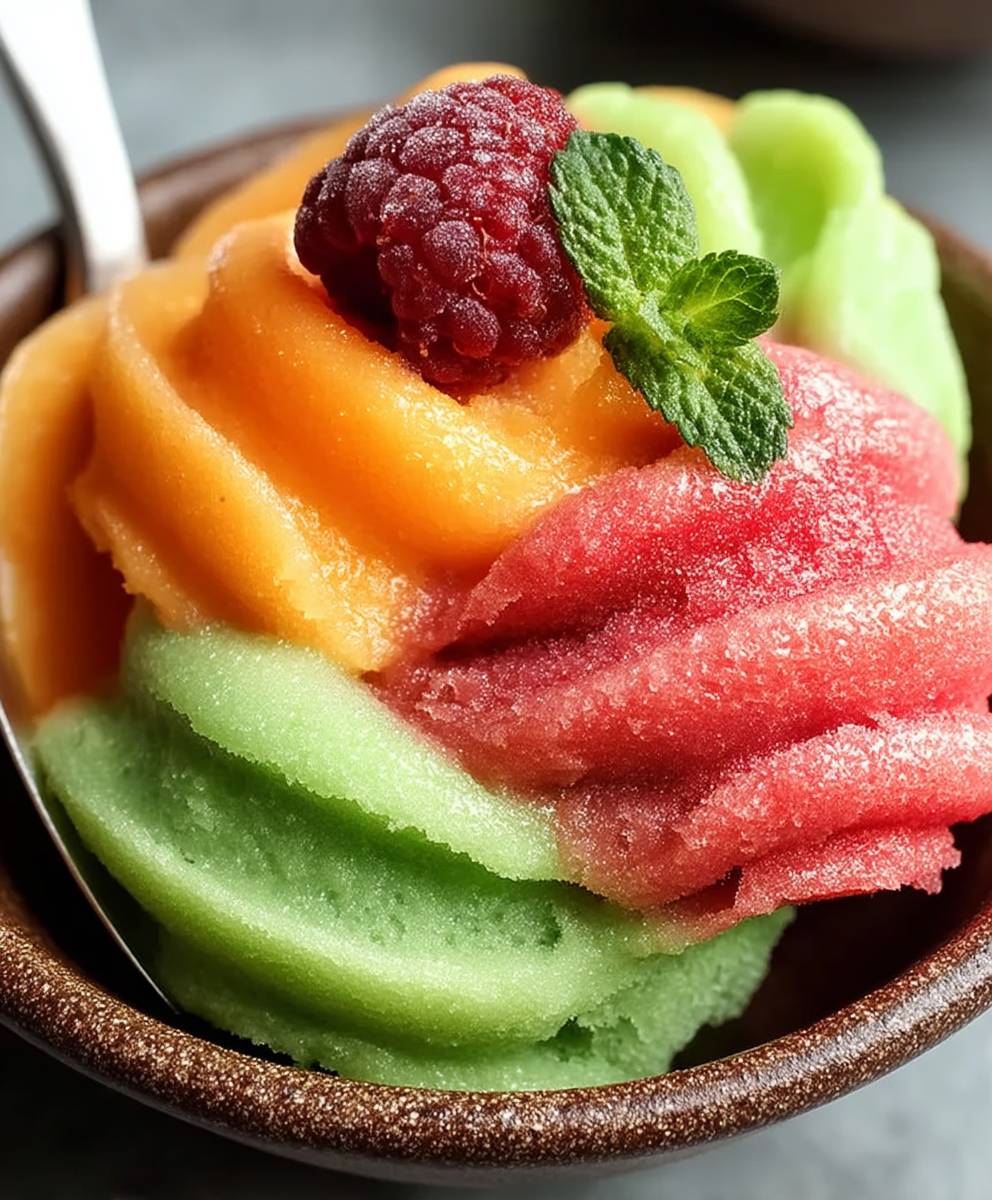
- Layers of brilliant orange, lime green, and raspberry pink create a stunning, Instagram-worthy presentation ideal for any celebration.
- Requires minimal hands-on time and uses basic kitchen equipment, making homemade frozen treats completely stress-free.
- Excellent served alone, paired with ginger cookies, or floated in sparkling lemonade for a sophisticated summer beverage.
The Nostalgia of Neapolitan Ice Cream’s Cooler Cousin
Before we dive into the science of freezing fruit puree, let’s clear up a crucial misunderstanding: Sherbet is not sorbet, nor is it ice cream. Sherbet is the charming middle child—it contains a small amount of dairy (milk or buttermilk), giving it a slightly creamy texture, but it remains predominantly fruit-based and refreshingly tart. Sorbet is strictly dairy-free, while ice cream is primarily heavy cream and egg yolks. Sherbet sits right in that sweet spot, offering the intense fruit flavor of sorbet combined with the smooth mouthfeel of soft-serve.
My own obsession began with a terrible mishap involving a picnic and a forgotten carton of milk. My grandmother, determined to salvage the situation, decided we would make a frozen treat using what she called “the colorful stuff.” She meticulously layered three distinct flavors, teaching me the magic of patience and careful freezing. Watching those bright colors solidify into stripes of citrus orange, electric lime, and deep berry was truly captivating. The resulting taste explosion felt like winning the summer lottery. Since then, I have refined her method to ensure maximum color separation and the creamiest texture possible without using a professional mikrobielles lab.
When making this vibrant dessert, the secret to its success lies in balancing the acidity of the fruit with the sweetness of the sugar and the richness of the dairy. We are aiming for a soft, scoopable texture, not a block of ice that requires a jackhammer to serve. This is where precise measurements and, crucially, the type of sugar you use come into play. A higher sugar content naturally lowers the freezing point, keeping the sherbet softer and easier to enjoy immediately after a short stint in the freezer.
Understanding the Flavor Components
To achieve that classic rainbow appearance, we typically rely on three distinct fruit profiles: raspberry (or cherry/strawberry), lime (or lemon), and orange (or pineapple/mango). Combining these intense flavors requires thoughtful preparation. You can use frozen concentrated juices for ease and intensity, but fresh juice will always provide a cleaner, brighter finish. For the berry layer, straining the seeds is paramount. No one wants to stop mid-bite to address tiny, crunchy intruders. Use a fine-mesh sieve or cheesecloth to ensure your raspberry component is silky smooth and ready to mingle with the dairy base.
The dairy inclusion can be as simple as milk, but using buttermilk or even half-and-half introduces stabilizing fats and acids that improve both the texture and the tang. Buttermilk, in particular, enhances the tartness of the lime and orange layers, preventing the final product from tasting overwhelmingly sweet. If you are struggling to find buttermilk, a decent substitute can be made by mixing whole milk with a teaspoon of white vinegar and letting it sit for five minutes—just long enough to slightly curdle and thicken.
Ingredients for Rainbow Sherbet: A Colorful Delight for Your Taste Buds
Here’s what you’ll need to make this delicious dish:
- Granulated SugarThis essential ingredient provides the necessary sweetness and, critically, lowers the freezing point to keep the sherbet soft and scoopable.
- Whole Milk or ButtermilkUsed as the dairy component to give the sherbet its characteristic creamy texture and slight tang, distinguishing it from sorbet.
- Raspberry Puree or ConcentrateForms the deep pink layer; ensure it is strained thoroughly to remove all seeds for a smooth finish.
- Lime Juice and ZestCreates the vibrant green layer, providing a sharp, refreshing citrus kick that balances the overall sweetness.
- Orange Juice and ExtractSupplies the orange layer with its signature sunshine flavor; fresh juice yields the best taste, but quality concentrate works in a pinch.
- Water and Stabilizer (Optional)A small amount of water helps mix the ingredients, and adding a pinch of pectin or vegetable gum can prevent large ice crystal formation.
- Food Coloring (Optional)Highly recommended to boost the visual impact, especially a bright green for the lime layer and deep red for the raspberry.
The full ingredients list, including measurements, is provided in the recipe card directly below.
How to Make Rainbow Sherbet: A Colorful Delight for Your Taste Buds
Follow these simple steps to prepare this delicious dish:
Step 1: Preparing the Base and Sugar Syrup
Combine the granulated sugar and water in a saucepan over medium heat, stirring until the sugar is completely dissolved. This creates a simple syrup base, ensuring no graininess remains in the final frozen product. Remove the syrup from the heat and allow it to cool completely before proceeding; warm syrup will ruin the texture of the dairy.
Step 2: Creating the Three Distinct Flavor Mixtures
Divide the cooled simple syrup and the whole milk or buttermilk equally into three separate medium bowls. In the first bowl, mix in the strained raspberry puree and red food coloring until a deep, uniform pink is achieved. In the second bowl, combine the lime juice, lime zest, and green food coloring for a vivid green hue. Finally, in the third bowl, incorporate the orange juice and orange extract, adding yellow and red food coloring drops as needed to achieve a bright orange shade.
Step 3: Chilling and Initial Churning
Cover all three sherbet mixtures and chill them thoroughly in the refrigerator for at least 4 hours, or preferably overnight. Proper chilling is absolutely essential for successful churning. Once chilled, churn each flavor mixture separately in your ice cream maker according to the manufacturer’s instructions. This usually takes about 15 to 25 minutes per batch. The mixture should resemble soft-serve ice cream when finished.
Step 4: The Art of Layering and Final Freezing
Choose a standard 9×5 inch loaf pan or a deep freezer-safe container. Begin the layering process by scraping the first churned flavor (I usually start with raspberry) into the pan, spreading it evenly. Transfer the pan to the freezer for 45 minutes to an hour until that layer is firm but still slightly soft. Repeat this process with the second flavor (lime), smoothing it carefully over the first layer, and freeze again. Finish by adding the final flavor (orange) on top.
Step 5: Achieving Hard Freeze and Serving
Once all three layers are in place, cover the pan tightly with plastic wrap or a lid to prevent freezer burn. Transfer the sherbet back to the freezer for a minimum of 6 hours, or overnight, to allow it to fully harden and the flavors to meld. Before serving, let theRainbow Sherbet: A Colorful Delight for Your Taste Budssit at room temperature for 5 to 10 minutes to soften slightly for easier scooping.
Transfer to serving bowls using a warm scoop for clean stripes and garnish with a fresh mint leaf for the perfect finishing touch.
Advanced Techniques for Creamy, Scoopable Sherbet
The biggest complaint people have about homemade frozen desserts is that they turn into hard, crystalline ice bricks overnight. Achieving that delightful, scoopable quality requires specific interventions designed to disrupt the formation of large ice crystals. This is chemistry disguised as dessert, and it is entirely manageable in a home kitchen.
Incorporating Inverted Sugars
While granulated sugar is necessary for structure, incorporating a small amount of liquid sugar, specifically corn syrup or light agave nectar, can dramatically improve the final texture. These are classified as inverted sugars, and they are excellent at binding water molecules, preventing them from grouping into destructive large crystals. I recommend substituting about a quarter cup of your granulated sugar with corn syrup in the simple syrup stage. This small tweak yields results that mimic premium, commercial-grade sherbet, maintaining its wonderful texture even after days in the deep freeze.
Another often overlooked trick involves the addition of a small amount of vegetable glycerin, which is easily found in baking aisles. Glycerin is a humectant, meaning it helps to retain moisture and keep the sherbet soft. A mere half teaspoon distributed across the entire recipe can work wonders. Remember, consistency in mixing is just as important as the ingredients. You must ensure the sugar syrup is fully incorporated and cooled to prevent the buttermilk from separating or curdling upon contact.
Optimizing the Churning and Freezing Process
Many novice sherbet makers rush the chilling phase. If your base mixture is not icy cold before it enters the churning machine, the machine’s paddle will simply aerate the mixture without freezing it properly, resulting in a thin, icy liquid. Always ensure your ice cream maker bowl has been frozen for the maximum recommended time, usually 24 hours, and that your base mixture is near-freezing before churning begins.
During the layering process (Step 4), time is of the essence, but patience is required. The brief 45-minute freeze between layers is crucial for achieving clean, vibrant stripes. If you add the second layer too soon, the weight will cause the colors to bleed together, creating a muddy pastel swirl rather than the distinct Rainbow Sherbet: A Colorful Delight for Your Taste Buds. Conversely, if you wait too long, the layers won’t adhere, and the final result will separate when scooped.
Finally, consider the temperature of your freezer. If your freezer is set too low (below -10°F or -23°C), even the inverted sugars will struggle to keep the sherbet soft. Aim for a standard freezing temperature of 0°F (-18°C) for the best balance of hardness and scoopability. Storing the sherbet toward the back of the freezer, where temperatures are most stable, also contributes significantly to maintaining its superior texture.
The Accidental Discovery of Sunshine on a Plate
I first created this stunning treat after confusing buttermilk with heavy cream, resulting in a delightfully tangy, surprisingly smooth texture that elevated the fruit flavors beyond my wildest dreams. That happy accident led me to refine this vibrant recipe, proving that sometimes, kitchen chaos delivers a perfectly beautifulRainbow Sherbet: A Colorful Delight for Your Taste Buds.
I swear, the first time I attempted to make a frozen dessert, it looked less like an elegant treat and more like abstract, pastel-colored slush that had been left out in a parking lot. My family was supportive, but their silence spoke volumes. I needed a win, a burst of unapologetic happiness captured in a chilled bowl. That’s when I rediscovered the glorious, technicolor magic of sherbet. Not sorbet, which is just juice playing it cool, but sherbet—that perfect, creamy middle child between ice cream and sorbet.
We are talking about something truly special, an experience that tastes like a carnival ride and looks like a unicorn exploded delightfully in your freezer. If you’ve been looking for that ultimate summer refresher, prepare yourself, because crafting this homemade delight is easier than trying to separate a toddler from their favorite stuffed animal. We are about to unlock the secrets to makingRainbow Sherbet: A Colorful Delight for Your Taste Buds, transforming simple fruit juices into a symphony of flavor layers.
The Ingredients You Need for This Colorful Delight
Making a spectacular rainbow treat relies on balancing intense fruit flavors with just the right amount of creamy body. We will focus on three classic, vibrant colors: orange, lime, and raspberry. Using fresh or high-quality frozen fruit purées gives you the best results, ensuring a depth of flavor that commercial versions rarely achieve. Remember, we are building three separate flavor bases before marrying them into the final, stunning sherbet.
- For the Simple Syrup Base:1 cup granulated sugar, 1 cup filtered water.
- Orange Layer:1 cup fresh orange juice, ½ cup heavy cream, 1 teaspoon orange zest, 1 drop yellow food coloring (optional, for vibrancy).
- Lime Layer:1 cup fresh lime juice, ½ cup heavy cream, 1 teaspoon lime zest, 1 drop green food coloring (optional).
- Raspberry Layer:1 cup raspberry purée (strained to remove seeds), ½ cup heavy cream, 1 tablespoon lemon juice, 1 drop red or pink food coloring (optional).
- Optional Stabilizer:¼ teaspoon xanthan gum or 1 teaspoon cornstarch mixed with 2 tablespoons cold water (slurry), added to the simple syrup to improve texture and prevent ice crystallization.
Step-by-Step Guide to Flavor Fusion
The trick to the rainbow effect isn’t complex magic; it’s patience and layering. We need to create three distinct, perfectly chilled bases before churning them sequentially. This ensures those beautiful, distinct stripes of color when you scoop the final product. Don’t rush the chilling—it is the secret weapon against grainy, icy sherbet.
- Prepare the Simple Syrup:Combine the sugar and water in a small saucepan. Heat gently until the sugar fully dissolves. Bring to a simmer for one minute, then remove from heat. If using a stabilizer like cornstarch slurry or xanthan gum, whisk it in now. Cool completely.
- Mix the Bases:Divide the cooled simple syrup evenly into three separate bowls (about ⅔ cup per bowl).
- Create Orange Base:To the first bowl, add the orange juice, cream, and zest. Stir well. Add coloring if desired.
- Create Lime Base:To the second bowl, add the lime juice, cream, and zest. Stir well. Add coloring if desired.
- Create Raspberry Base:To the third bowl, add the raspberry purée, cream, and lemon juice. Stir well. Add coloring if desired.
- Chill Thoroughly:Cover all three bowls and refrigerate them for at least 4 hours, or preferably overnight. They must be ice cold before churning.
- Churn and Layer:Following your ice cream maker’s instructions, churn each flavor individually until it reaches a soft-serve consistency. Start with the green lime flavor, spoon it into the bottom of a freezer-safe container, and spread it flat.
- Repeat Layers:Churn the orange flavor next, carefully spooning it on top of the lime layer. Finally, churn the raspberry layer and spoon it over the orange. Do not swirl or mix the layers if you want distinct stripes.
- Final Freeze:Cover the container tightly (press a layer of parchment paper directly onto the sherbet surface to minimize ice crystals) and freeze for 4 to 6 hours until firm.
Perfecting the Cooking Process
Ensure you prepare the simple syrup first and chill it completely before mixing with the fruit purées; warmth ruins the texture immediately. Next, mix and chill the three separate bases overnight, and only begin churning the next day, starting with the flavor you want on the bottom layer.
Add Your Touch
Feel free to substitute the raspberry layer with strawberry or cherry purée for alternative reds, or swap lime for pineapple for a tropical twist. For a dairy-free option, use full-fat coconut cream or oat cream instead of heavy cream, maintaining the luscious texture while keeping it vibrant.
Storing & Reheating
Store the sherbet in an airtight container deep in the freezer, avoiding the freezer door where temperatures fluctuate wildly. Sherbet maintains peak quality for about two weeks; let it soften on the counter for 5–10 minutes before scooping for the best texture.
Tips from the Sherbet Master
-
Always strain your fruit purées, especially raspberries, to ensure a silky-smooth mouthfeel and avoid those annoying little crunchy seeds in your refreshing dessert.
-
Do not overfill your ice cream machine bowl; the mixture expands significantly during churning, and overfilling can damage the machine or create a sloppy mess.
-
Adding a splash of high-proof clear fruit vinegar (like apple or pear) to the fruit base enhances the tanginess, making the fruit flavors pop even more intensely.
One time, my niece refused to eat anything green, so I told her the lime layer was “magical emerald dust,” and she devoured the whole bowl, confirming that a good story is the best seasoning.
Why Rainbow Sherbet Holds the Crown
There are many chilled desserts out there—the rich decadence of chocolate ice cream, the refreshing minimalism of lemon sorbet. But sherbet? Sherbet occupies a unique space in the dessert universe. It delivers the intense, mouth-puckering zest of pure fruit while offering that creamy, comforting finish that only a little dairy fat can provide. It’s the perfect compromise, the harmonious balance between fruity lightness and creamy satisfaction.
When you present this layered dessert, you’re not just serving ice cream; you’re serving edible art. The visual appeal alone is enough to elicit oohs and aahs from even the most jaded dinner guests. The key to maintaining that visual integrity is temperature control during the layering phase. If the first churned flavor is too soft or melts while waiting for the subsequent layers, the colors bleed, and you end up with a muddy, albeit delicious, mess. Think of yourself as an edible architect, carefully laying brick upon brick of flavor.
Many home cooks skip the stabilizer, believing it unnecessary, but a tiny pinch of xanthan gum or a cornstarch slurry truly acts as an insurance policy against crystallization. When water freezes slowly, it forms large, unpleasant ice shards. A good stabilizer interferes with this process, keeping the texture smooth and scoopable straight from the freezer. This is crucial for sherbet, which contains more water than traditional high-fat ice cream. If you skip this step, be prepared to let it thaw longer before digging in, which risks melting the beautiful structure you worked hard to build.
If you find that your chosen fruit purée lacks punch, don’t hesitate to fortify it. A little concentrated fruit extract or even a few drops of natural food coloring (as listed in the ingredients) can boost the vibrancy. We eat first with our eyes, and while flavor is paramount, the rainbow aspect of this dessert is precisely what makes itRainbow Sherbet: A Colorful Delight for Your Taste Buds. This isn’t just a treat; it’s a mood booster, a burst of optimism captured in three delightful stripes. Trust me, once you master this layering technique, you’ll feel like a true dessert ninja, capable of conquering any freezer challenge that comes your way. Get ready to enjoy the sweetest, coolest victory of the summer.
Conclusion for Rainbow Sherbet: A Colorful Delight for Your Taste Buds
Making homemade sherbet might seem daunting, but the preparation is straightforward: cook the simple syrup, mix the vibrant bases, chill them completely, and churn them into soft perfection. We emphasized the necessity of cold ingredients and careful layering to achieve that signature striped effect. This three-flavor frozen treat offers the ideal balance of intense fruit zest and light creamy texture, making it a sophisticated step above simple sorbet. Once you serve this stunning, multi-hued dessert, you’ll realize why thisRainbow Sherbet: A Colorful Delight for Your Taste Budsis an essential recipe for warm weather entertaining, promising joy in every spoonful.
Leave a Comment